Push fit fittings are one of the most widely used plumbing technologies today. They make jointing CPVC, copper, and PEX pipes fast and effortless without need for soldering or crimping required.
Despite their widespread acceptance, some plumbers remain doubtful about its effectiveness. Fortunately, attitudes have shifted and most push fit fittings are now approved for both in-wall/underground as well as permanent installation applications.
1. Determine the Pipe Material
Pipe material selection is a crucial aspect of any manufacturing facility’s fluid handling system. When selecting the material for your pipes, take into account the liquids, temperatures and pressure they must transport as well as any other factors that may come into play during operation.
Your pipe material should not be too fragile or weak, as this could break during transport and cause you and your employees to become ill or injured. Therefore, use a material which can withstand extreme temperatures both hot and cold.
Metal pipe liners are usually the best choice for high-temperature piping applications. Copper and aluminum can often be utilized here; however, if your facility works with hazardous liquids that require precise temperatures, specialized piping materials may be needed.
Another essential consideration when designing your piping system is the type of service fluid it transports. Some liquids, like crude oil, sea water and ammonia, can be highly corrosive so you should opt for corrosion-resistant pipe material.
Noncorrosive liquids like air and lube oil are less likely to damage piping material. Furthermore, temperature changes in the service fluid can also have an effect on your pipes; colder temperatures make them brittle and breakable.
Finally, the pressure of liquids transported through your piping system can also be an issue. Industrial manufacturing facilities typically handle around 150 pounds per square inch (psig), but some must work under much higher pressures.
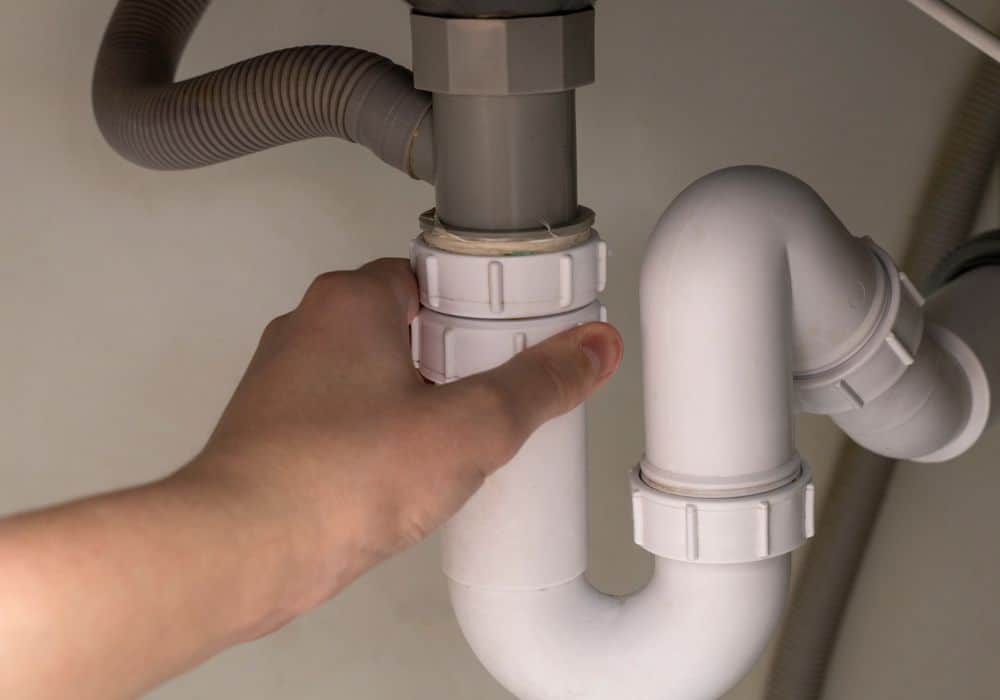
Start by inspecting the piping in your home and identifying its material. This will enable you to cut it with appropriate tools, giving you a better insight into how push fit pipe connectors should be fitted.
2. Cut the Pipe
Push-fit pipe connectors are an effective way to ensure your pipes remain secure. However, they require meticulous attention to detail and proper technique in order to be installed correctly.
First, cut the pipe so that it fits squarely around and even with the fitting. Doing this ensures a watertight seal around both pieces of equipment.
To accomplish this task, use a tubing cutter tool suitable for the type of pipe you are working with. Options include rotary pipe cutters for copper tubing or pipe shears for plastic pipe.
Next, remove any sharp edges or burrs on the pipe. These can damage an “O” in a push-fit and cause leaks. To avoid this, deburr the pipe using either a standard copper reamer, Emery cloth and fine sandpaper.
Once the pipe is smooth, you can begin inserting it into a push-fit fitting. To do this, mark the depth of the fitting and firmly push in until your pipe meets this mark.
Additionally, make sure the insertion depth of your release collar is within 0.005 in (0.13 mm) of its end, to avoid loosening during installation.
3. Deburr the Pipe
Before inserting the pipe into a push fit fitting, it must first be deburred. This step is essential for connecting the pipes as burrs can damage the “O” in the pipe or create turbulence within the joint that could result in leakage.
Deburring pipes is a simple task that can be accomplished using sandpaper, a file and the pen reamer – an instrument with a bent blade that scrapes away burrs from inside a pipe to protect its “O” fitting. There are various methods for deburring pipes.
You may want to try using a multi-purpose inside and outside deburring wheel (Amazon link – opens in new tab), which has a sharp blade that scrapes the pipe from both inside and outside. This method works particularly well for removing burrs from copper tubing.
This tool works on pipe IDs from 3/16 in. to 1 inch and can deburr both the outside and inside diameters of steel, stainless steel and soft tube. Simply place the blades on the outer diameter and rock back and forth or rotate clockwise to clean out any burrs on the inside.
When using a push-fit pipe connector, such as SharkBite brass push-to-connect fittings, proper insertion depth of the fitting is critical for creating a secure and watertight connection. You can measure your pipe with either a deburring/gauge tool or refer to an online chart of appropriate insertion depths for different materials.
To make a proper push-fit connection, insert the pipe into the fitting until it meets with the tube stop. Turn on your water and check that the connection is secure; if not, repeat these steps to fix the issue and guarantee a secure system free from leaks.
4. Insert the Pipe
Push fit pipe connectors offer a convenient and time-saving alternative to soldering or crimping copper, PEX, CPVC and PVC pipes. However, there are a few things you should take into consideration before beginning to install these fittings.
Before anything else, you need to determine the pipe material. Selecting the right kind of pipe is critical for creating a reliable seal in your home or business; if not selected properly, leaks could occur.
Next, it is essential to cut the pipe as squarely and accurately as possible with a tubing cutter tool tailored for the pipe you are using. Furthermore, deburring will help guarantee an accurate fit by improving clearance around corners.
Finally, measure and mark the pipe to indicate where you plan to insert your fitting. Doing this ensures you are installing your fitting correctly and avoiding potential leaks.
Inserting the pipe into its fitting correctly requires more precision than simply pushing it in, but it’s an essential step for creating a secure connection between two pipes. Make sure you use proper tools like pliers to grab hold of the fitting securely.
The most remarkable part of this process is that the pipe and fitting may actually “melt” together, making pushing them in relatively effortless. This works best with plumbing PVC pipe but is possible on other types as well. The only downside is that it may take 30 seconds for full cure; however, once complete, you have a solid connection between both pieces.
5. Push the Fitting
When installing push fit pipe connectors, it’s essential that you adhere to the manufacturer’s instructions. Furthermore, make sure the connection is watertight and safe for usage.
To determine the correct insertion depth for a pipe fitting, measure and mark it. Doing this helps guarantee you don’t over-insert the pipe and end up damaging its O-rings inside of it.
Before inserting the push-fit fitting, deburr the pipe with a file or 80-grit sandpaper to avoid damage to O-rings and make sure the fitting seals are intact. Doing this helps avoid leaks in the future.
A proper deburring tool should have enough length to cover the full fitting and pipe’s length. If you don’t own one, measuring tape can be used instead.
Another essential tip is to cut the pipe squarely and free of burrs or sharp edges. This is especially essential when working with copper pipe since these can damage O-rings and compromise fitting fit.
Once you’ve made a clean and square cut, you can move onto the next step in installation. Depending on the fitting type, you may need to insert a PEX insert into the pipe before installing the push-fit. This insert reduces flow through copper tube; thus why most manufacturers recommend removing it before using again.
You can adjust the fitting if necessary by firmly twisting it. Doing so ensures that its ring of metal teeth grips the pipe securely, creating a watertight seal – similar to “twist and lock” fittings which require you to turn the nut at an exact torque for full security without having to manually tighten first.