Gluing PVC pipe together is an efficient way to create a secure joint for your plumbing project. However, you must take special care during the process in order to guarantee that your repairs are strong and long-lasting.
PVC glue is a special solvent that chemically bonds pipes and fittings together, creating one solid piece that cannot be separated without cutting it away.
Preparation
When adhering PVC pipe together, it is essential to adhere to all safety instructions provided on the glue packaging. This includes wearing gloves and protective eyewear as well as working in an adequately ventilated environment.
Drop cloths can also be used beneath your work area to catch any drips and splashes as they occur, keeping it clean and safe – especially when working outdoors.
Before you glue your pipe, it is essential to prepare its surfaces. Eliminating oil or dirt will help the glue adhere better. You can use a small amount of PVC cleaner on these areas for this purpose.
Once the surface is clean, apply your PVC cement. You can either use the dauber that comes with your product or just dab a thin layer onto both pipes and fittings before inserting them into each other. After they’re in place, twist slightly to align the yellow markings.
After applying PVC cement, it’s essential to wait a period of time before moving the tiles. This gives the cement time to set and cure.
Once all your pipes and fittings are connected, you can create a leak-free joint – the cornerstone of success for your entire project.
Selecting the ideal glue is essential for creating a long-lasting, reliable joint. Make sure your PVC cement adheres well to the material, has excellent bond strength, and is resistant to water, heat and pressure.
For optimal results, choose a PVC cement that’s suitable for the climate you’ll be working in. Furthermore, ensure it has a solvent rating suitable for pressurized projects.
Before you begin glueing, be sure to dry-fit the pieces to make sure they fit and are square. Doing this helps avoid any mistakes and saves you time or money on an unsuccessful pipe connection.
Depending on your application, you can select from several types of PVC pipe cements. These include PVC cement, silicone glue and glue-able rubber.
Priming
Priming is the process of softening pvc pipe before it’s glued together. This step is essential as it creates a stronger bond between the pipe and fittings that will be used for adhesion.
It is essential for making sure pvc pipe is cut correctly and fitted into its fittings. To do this, dry fit all parts together and mark or number them if necessary so as not to glue the wrong ones together.
When choosing a primer for schedule 40 piping or CPVC fittings, ensure it meets the compatibility requirements. For Schedule 80 pipes and larger diameter fittings, use a medium body primer; otherwise, opt for heavy body coating.
Apply the primer using an applicator provided in the cap – such as a brush, foam roller or dobber. Wear gloves when applying primer since it can stain surfaces if it comes into contact with your skin.
Once you’ve cleaned both pipes and fittings, apply a thin coat of primer over both surfaces – do not overapply as this could create a puddle on your workspace. After that is dry, apply cement and assemble both pieces together.
It is essential that you do not let the cement dry too quickly, as this can weaken the joint. With only about 10 seconds to apply the cement and insert the pipe into its fitting, work quickly and be mindful not to twist too much during application.
By cutting PVC pipe with a PVC pipe cutter, any jagged edges that may have been left behind should be smoothed away. Otherwise, they could compromise the seal between pipes and fittings as well as catch debris flowing through them and clog them up.
Gluing
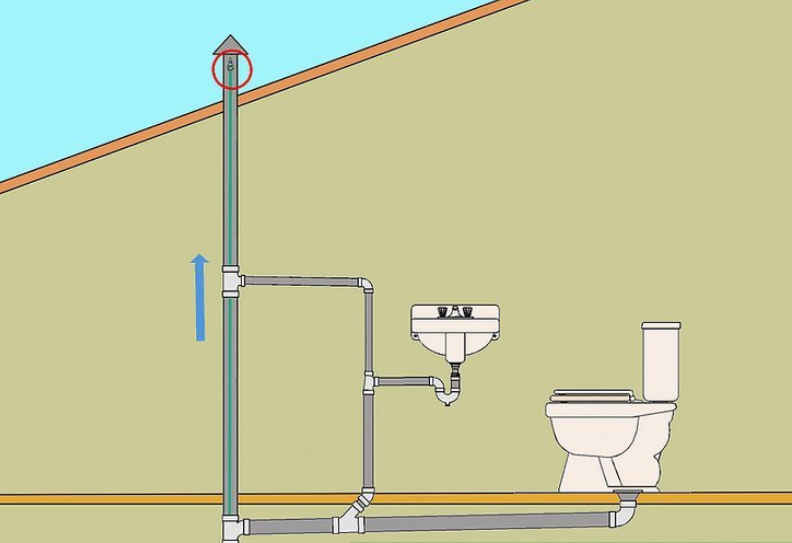
Gluing PVC pipe is the process of connecting two pieces of PVC together using a solvent-based glue. It’s an efficient way to join pipes for various projects, from creating an open closet system to connecting other types of plumbing to create structures or gardening drainage systems.
The initial step is to measure and cut your PVC pipe and fittings precisely according to your required size. Doing this helps avoid mistakes when gluing, guaranteeing everything fits perfectly. Additionally, now would be a good time to mark and number each connection for easier matching later on.
Once your pipes have been cut to the length needed, it’s essential to remove any burrs which could interfere with glueing or welding. You can do this with a pipe cutter, hand saw or reciprocating saw. Alternatively, 80 grit sandpaper can also be used on both the outside of the pipe and fitting for buffing purposes.
Once your pipes have been cut and sanded, you can begin applying solvent-based PVC glue to their joints. Be sure to wear gloves as well as eye protection when working with this fluid.
When it comes to PVC glue, the best type for high-pressure applications like potable water and plumbing projects is Type P. While they tend to be the priciest option available, these glues are specifically made for these uses and offer excellent repair options for PVC and other plastic pipe.
If you’re uncertain which glue type to purchase, read the manufacturer’s instructions carefully. They typically specify what projects the glue can be used on and if there are any exceptions listed.
Once you’re ready to glue, apply a thin layer of PVC glue on both sides of the joint and allow it to dry for 30 minutes. Some products recommend a dry time of 30 minutes; however, faster-acting varieties offer guaranteed dry times of less than two hours.
Once your pipes have been joined together, twist them to ensure a tight seal and avoid glue clumps that could take longer to dry. Doing this makes the process faster and less messy.
Finishing
The final step in joining pipes involves prepping them. This involves cleaning both fitting and pipe to remove dirt, debris and other materials on them. Also, use a deburring tool to eliminate burrs that might interfere with fitting alignment. Inspect the pipes for any other issues that need attention such as holes or leaks that need fixing before proceeding with assembly.
According to your needs, you might need to cut PVC pipe before joining it. Fortunately, there are a few tools that can effectively cut these pipes: hacksaws and cutters are two options worth considering. Both tools offer great efficiency when cutting PVC, though be mindful that saw blades are razor sharp and may result in jagged edges if not handled with care.
Cutter tools offer an efficient solution for cutting a wide variety of pipe sizes. They can handle pipes as small as 1 inch in diameter and up to 2 inches thick, giving you the freedom to tackle projects quickly and with minimal fuss.
Another efficient choice for cutting pipe is a cable saw. This tool can be especially helpful when making cuts that would otherwise be impossible with traditional tools like hacksaws or cutters. To use it, wrap the cable around part of the pipe you wish to cut and pull on both ends alternating until complete.
If you need to sand a piece of PVC pipe by hand with 220-grit sandpaper, be gentle and avoid oversanding as this could damage the pipe.
You could also buy a tool that does the sanding for you. These typically come in various grits and can be used for light or rough finish sanding. They’re often sold as kits or even come equipped with sandpaper.
It is also beneficial to dampen a rag with acetone and wipe the surface of the PVC pipe. This will help clean the pipe and expand its pores, making it more porous so paint can adhere better.